Creating beautiful artwork with embroidery is not easy for everyone, but not anymore, because we are here to help you in this regard.
This guide is for all young ladies interested in needlework and striving to improve. Today we will discuss everything about lazy daisy stitch in detail as it is the easiest stitch, and once you have mastered this stitch, trust me, embroidery will be a cakewalk for you.
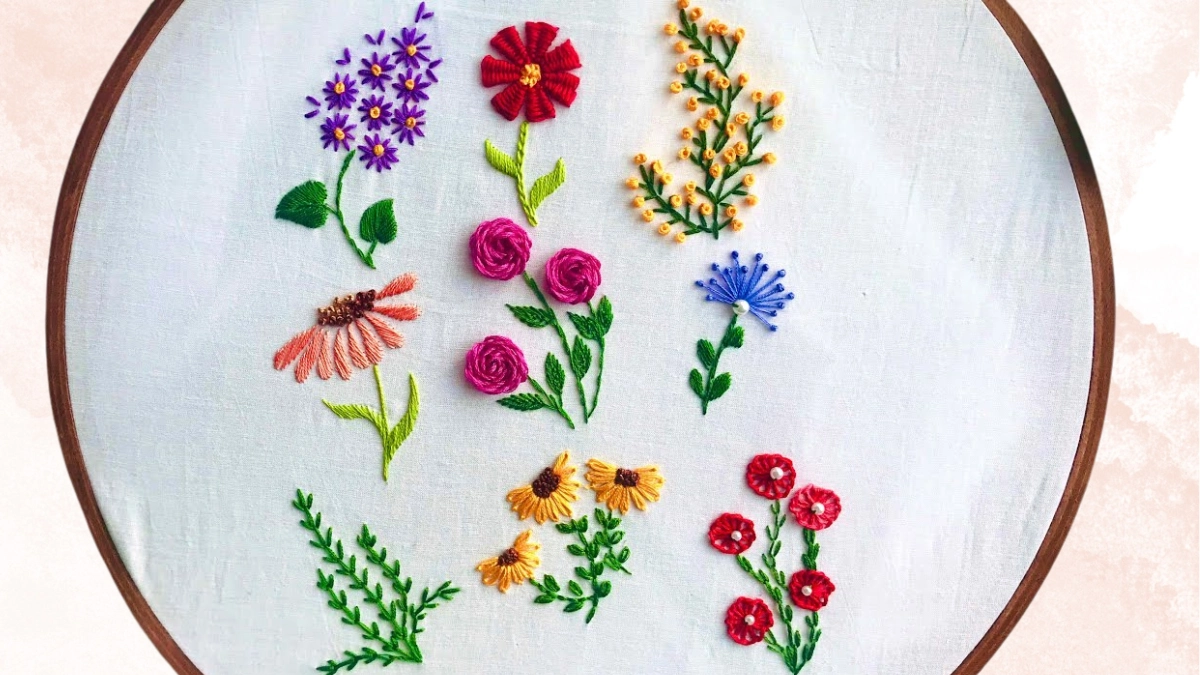
Does beautiful embroidery work fascinate you? Let’s try it out with us. So are you ready to create lovely, lazy daisy stitch designs with me?
Grab your stuff quickly and follow our guide till the end because we have broken this seemingly difficult task into a few simple steps to make it easier for beginner embroiderers. So let’s get rolling.
Table of Contents
- 1 What Is Lazy Daisy Stitch?
- 2 What You Will Need for Lazy Daisy Stitch
- 3 Learn How to Create More Patterns With Lazy Daisy Stitch
- 3.1 Extra Tips
- 3.2 Double Lazy Daisy Stitch
- 3.3 Bonus Tips for Double Lazy Daisy Stitch
- 3.4 FAQs
- 3.4.1 How many strands of lazy daisy?
- 3.4.2 What is the other name for Lazy Daisy stitch?
- 3.4.3 What is a double Lazy Daisy stitch?
- 3.4.4 What is a lazy daisy stitch used for?
- 3.4.5 What is the difference between chain stitch and lazy daisy stitch?
- 3.4.6 How many petals are in a lazy daisy stitch?
- 3.4.7 What kind of embroidery needle is used in the Lazy Daisy stitch?
- 3.5 Final Verdict
What Is Lazy Daisy Stitch?

If you are curious about how embroiderers draw cute little flowers with thread on a piece of fabric, then the answer lies in lazy daisy stitches. Before we explain the steps of lazy daisy stitch to beginners, let’s have a one-line introduction to this stitch.
In simple words, lazy daisy stitch is a series of big elongated loops meeting at a common center point. Furthermore, the lazy daisy stitch pattern can be joined or separated from the center depending upon the preference of the embroiderers.
Other Names Of Lazy Daisy Stitch
Do you know this simplest stitch is also known by names other than lazy daisy stitch? Although it is more commonly known as lazy daisy stitch, you should read the points below if you want to know its other names. Here are the two uncommon names of lazy daisy stitches.
- Single chain stitch
- Detached chain stitch
What Can You Create With Lazy Daisy Stitch?

- Beautiful flowers
- Flower petals
- Small leaves
Lazy Daisy Stitch Tutorial
We have an easy tutorial for all the new embroiderer fellas. Do you also want to know how experts do lazy daisy stitch neatly and effortlessly? If so, sit back and read this article thoroughly or practice this stitch with us. After following our guide, I am confident you will be able to do it like your grandmothers and professionals. So let’s get into this.
What You Will Need for Lazy Daisy Stitch

Lazy daisy stitch is the most superficial and doesn’t even require a lot of materials which is a relief for many beginners as they don’t have much embroidery-related stuff at home. And if you want to try this stitch while reading our stepwise tutorial, here is a short list of things you will need.
- A hoop to hold the fabric tight, so you don’t have to struggle to get the cloth in position again or ruin the stitch because of losing grip on the fabric.
- Secondly, you will need a strong thread that doesn’t split. You can even use embroidery flosses to create cute little patterns in different colors.
- A pair of scissors to cut the thread.
- Lastly, you will need needles where your thread will go.
Step 1
The very first step of embroidery is deciding on a pattern to work on. So before getting thread into your needle, you will need to select a pattern for your work.
No worries if you haven’t decided yet. You can search for a cute floral pattern online or any pattern you like and start working on it. You can make as many petals as you want, but in the beginning, it’s better to stick with four, five, or six-petal floral patterns.
Step 2
After you have decided what pattern you will be working on, the next step is to draw that pattern on the fabric with fabric chalk or pencil. You can skip this step if you want, as many embroiderers prefer embroidering immediately without drawing a pattern of their liking on the fabric, but I suggest you not skip it.
Having a pattern drawn on the fabric helps many beginners not ruin their work as you will be embroidering the drawing, and the results will be as good as an expert.
Step 3
This is the step where many beginners struggle a lot, but you don’t have to worry because I got your back. All you need to do is follow the drawing you have drawn on the fabric, and you are good to go. Take your needle, pass a colorful thread through it, and start the needlework.
Step 4
Can you see the central round part connecting all your flower petals? It will be your starting point. Always keep in mind to enter your needle from here and move along. Bring your thread and needle to the bottom of any petals from the center point and start working.
Step 5
Leave a small gap from the starting point, bring your needle down halfway through the bottom of the nearest petal, and take it out again from the tip of the same petal. Remember not to pull the thread all the way through and keep the thread below the needle while taking out the needle from the tip of the petals. It will give a loop shape to the petal.
Step 6
Now comes the most crucial step, which is securing the petal. You must be feeling anxious about how you will do it. Well, it is elementary. Just pull the thread from the tip and put the needle down half an inch away from this point. You will get a small stitch at the tip of the petal that will secure it tightly and won’t let it loosen up easily.
Clap for yourself. You have completed one petal. Now let’s move on to the next one.
Step 7
After completing one petal, you can start the next one and repeat all the steps till the end. There are two ways of doing it: you can either start the next petal without cutting the thread or cut the thread every time you complete a petal and start a new one.
If you continue with the same thread, you must make a loop. For loops, the needle will go from the tip of the petal and take it out from the base of the new petal. Pull the thread through the new petal’s base and repeat the procedure till you are done with all the petals.
Step 8
You can leave the central part or make it more pretty. You can fill it in with a contrasting color thread. We recommend filling it in with numerous french knots or stem stitches to give it a neat finish. I prefer french knots as they look more attractive.
Learn How to Create More Patterns With Lazy Daisy Stitch
Follow all the steps mentioned above to create beautiful flowers and floral patterns, but did you know the lazy daisy stitch is not limited to floral designs only? Yes, you heard it right. You must be curious about what else you can make from this stitch, aren’t you?
The good news is you can make leaves with it too, so if you are interested in knowing the method of making leaves with lazy daisy stitch, then the below-mentioned points.
- Making leaves with lazy daisy stitches is the same as making a floral petal. Just repeat the loops.
- To make a stem, all you need to do is place the loop in a straight line, and Voila, you are done.
- To create a leaf with a lazy daisy stitch, make one big loop like a flower petal.
- Follow the drawing if you are making several leaves on a single stem. Just keep on making loops till the endpoint.
- You can fill the leaf with a satin stitch for more detailing and embellishment.
Extra Tips
- If you still face difficulties after reading our guide and think lazy daisy is not your cup of tea, then you are wrong because it is the simplest stitch if you try to learn it with full attention. So here are a few bonus tips for beginners to ease their journey and make it more fun.
- Rounded petals look neat, so if your petals are not round, follow my tip. To keep the petal tips round in shape, don’t pull them too tight or secure them too close to the petal. I can assure you this will resolve more than half of your problems.
- The second most common problem beginner embroiderers face is breaks or splits. Are you facing this problem too? If so, I recommend you use good-quality thread for a lazy daisy or embroidery floss.
Double Lazy Daisy Stitch
A beautiful variation of lazy daisy stitch is a double lazy daisy stitch. If you are good at needlework and embroidery, you can take this to the next level by drawing double lazy daisy stitches on the fabric. Don’t worry if you are listening to this for the first time; follow our guide to create beautiful designs. So are you ready?
- For the double lazy daisy stitch, you will be using all six strands of the embroidery floss, but if you are a beginner, I will advise you to go with two strands only and practice till you get used to it.
- First, create a loop like in a lazy daisy stitch. The double lazy daisy starts after you firmly secure your first pattern.
- Now use this small loop stitch you secured your first petal with and run your thread straight through it and insert it again at the starting point. Tada, you are done.
Bonus Tips for Double Lazy Daisy Stitch
- Double lazy daisy stitch confuses many beginners, so it’s better to learn simple lazy daisy stitch before trying double lazy daisy stitch.
- You can directly start embroidering the pattern with a double daisy stitch if you are good at it to create beautiful and charming patterns.
- You can blend it with other stitches to decorate the patterns more or add small attractive details.
FAQs
How many strands of lazy daisy?
Usually, for lazy daisy stitches, many people use all six strands of the embroidery floss. Moreover, there is no hard or fast rule of how many strands should be used for lazy daisy stitches. It depends on the design and the skill level of the embroidery, so you can adjust the number of strands according to what you can easily handle.
What is the other name for Lazy Daisy stitch?
The lazy daisy stitch is also known as a detached chain stitch. So if you are wondering what you can call a lazy daisy stitch other than this, the answer is a detached chain stitch, but it is not commonly used.
What is a double Lazy Daisy stitch?
The double lazy daisy stitch is the same as the simple lazy daisy stitch. The only difference is the number of rings. Unlike the usual lazy daisy stitch, the double lazy daisy stitch has two or more rings drawn, just like the simple one. You can even use different colors to make double lazy daisy stitch rings.
What is a lazy daisy stitch used for?
Lazy daisy stitch is the simplest of all stitches and is most commonly used to create simple floral designs made up of flowers and leaves. Moreover, you can draw multiple french knots in the middle to give your pattern a beautiful finish and complete the look of the flowers.
What is the difference between chain stitch and lazy daisy stitch?
Lazy daisy stitch and chain stitch look similar but are very different from each other. Lazy daisy stitch is a simple single chain loop and non-continuous, whereas chain stitch is continuous and has several small chains all along the pattern, even if it’s a single flower petal. While in a lazy daisy, you will be done with a single long chain to make a flower petal.
How many petals are in a lazy daisy stitch?
There is no fixed number of petals in lazy daisy stitch, so you can go with four or five petals or even eight petals. It is totally up to you how many petals you want in your flower.
What kind of embroidery needle is used in the Lazy Daisy stitch?
For lazy daisy stitch, you should use a needle of size eight or above.
Final Verdict
Many people love showing their artistic skills by drawing beautiful designs with embroidery, while some use it as a hobby to pass their time.
However, embroidery is not less than any other art. If you want to learn this skill, I recommend you start this journey with a lazy daisy stitch. It is the simplest of all the stitches but can be difficult for beginners.
You don’t have to worry because our guide will save you from all the struggles a beginner usually faces while learning embroidery. So say goodbye to all your worries and begin the journey of being a lazy daisy expert using our article as a guideline. Good luck.