
Your hand embroidery project looks attractive when you use professional steps on how to start embroidery thread for your work. Women love to stitch unique embroidery motifs, but sometimes less knowledge of their starting and finishing methods destroys their efforts.
Table of Contents
Start Embroidery Thread Methods
Old ways of starting and ending an embroidery thread with knots are now replaced with other sleek methods. The knots method does not work well on some fabrics, and by the time knots get loose when you wash the embroidered piece, it ruins your hard work.
Below, we share some best ways to start an embroidery thread before you have to understand some key points. If you are a beginner, you must read all instructions carefully to learn professional methods.
Let’s start Embroidery Thread without a Knot
Yes, you can start your embroidery thread without a knot quickly. Start your next embroidery work with the below-mentioned ways and enhance and secure your handwork with perfection.

Waste knot:
- You have to make a temporary knot in this method
- To start, make a knot on the side of your frame
- Now come to the front side of the fabric, on the point where you want to stitch
- Make sure you leave a 2/3 inch long tail
- After finishing your work, cut off the knot
- And secure the tail part
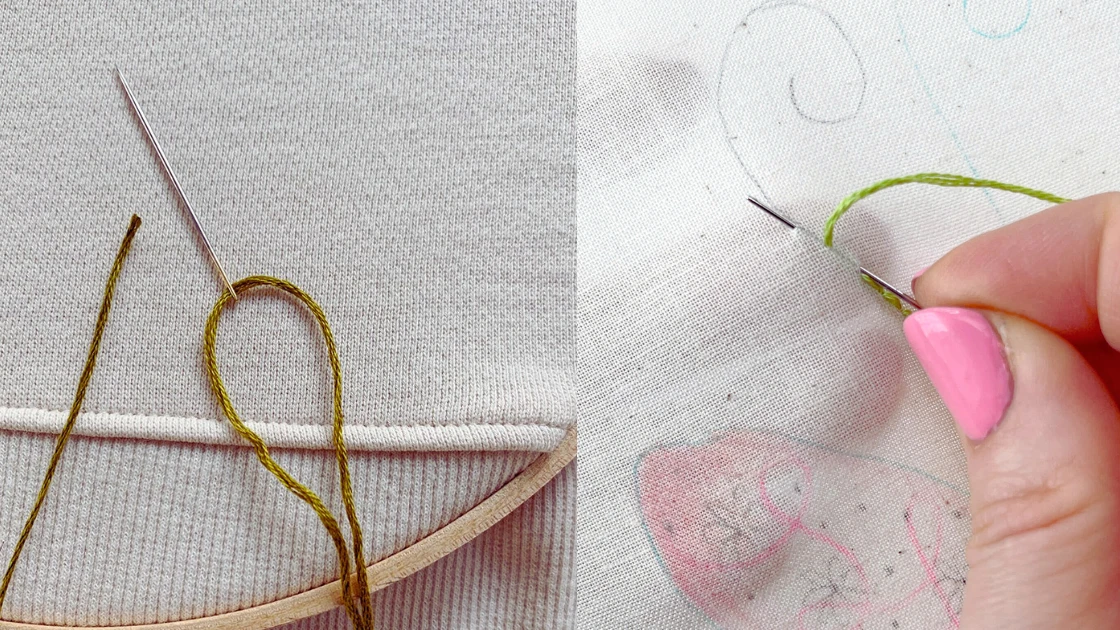
Tail leaving method:
- First, leave 2/3 inch thread behind the Fabric like a tail
- Now, make a grip on the tail and start your work
- After 3to 4 stitches, it will be secure in its place
- Now you can complete your work without holding the tail
- After completion of work, you can secure the remaining bottom with other stitches
Running stitch method:
- Running stitch is best when you are doing work that covers up that stitch
- To start, make some running stitch and then begin your work on them
- Your embroidery will cover these stitches and also provide security to your work
- In the end, just cut out the extra tail if needed
If you want to take this skill to a professional level then I would recommend you going with a custom designing machine that can be a business machine and Suitable for beginner level users as well.
Starting Embroidery by using the Knot Method
You are new to learning embroidery and want the easiest way of starting an embroidery thread. So you can go for the knot method as it is simple yet continent for you as a beginner. But you have to use this method only on thick or sturdy Fabric.

Half knot/overhand method:
- This is a simple method like you tie a knot for anything on a string
- Pick the end of the thread and make a knot
- This tiny knot will go well with the Fabric, which is weaved tightly
Quilter’s knot:
- This method is best when using four strands and needs a knot
- A Quilter knot is perfect because it provides a bigger knot
- First, pick the tail part of all four threads and close it with your needle
- Now start twisting the thread around the needle
- Keep turning. It will make a large knot
- Grip the twisted part in your thumb and finger
- And gently pull the needle through it
This method will help to make quilter knot.
How to Finish my Embroidery Stitch?
You can finish your embroidery stitch by 3 methods, there are some ways given of ending embroidery stitch. You choose which way you like to try to finish your embroidery project.
Finish without knot:
After finishing your embroidery, bring the needle back side of the work and use weaving stitch to secure the ending tail of the thread with other stitches.
Finish with joining the end:
You have to turn back your embroidery piece and pick the remaining part of the threads. Now make knots by joining closer tails of threads together. If you have only one thread tail, make a tighter knot in this tail by creating a lope near the end point of work.
Weaving the tail:
After finishing your embroidery task, you can weave the remaining tail of the thread. When you are done with the work, bring the tail reverse of the work and start weaving it with the help of the needle with the other stitches. Finally, secure it by making it a little lope and pull it to make a knot.
Why do we need to learn starting embroidery thread method?
An embroidery piece’s starting and finishing process must look elegant and secure. The way you choose to start your stitch makes your work tear-free for the future. Loosed stitches and knots make embroidery less attractive, and after washing many times, it will fly away.
Cons of knots
- The knot creates a bumpy look reverse side of the work, and it will be visible through light and thin fabric.
- The knot looks untidy from the front side of your work when you use see-through material.
- Sometimes knots get tangled with other stitches or with a needle during the work.
- Knots loosen over time and the washing process, and your favorite stitches get ruined.
Summary
Hopefully, you understand all mentioned methods and tips regarding starting an embroidery thread. You can select methods according to your type of project. As a beginner, try to stick with simple techniques.
If you try other methods the first time, try to practice it on a rough piece before making the final embroidery piece. After learning how to start and end an embroidery thread, you can make an excellent embroidery piece like a pro.
Frequently Asked Questions
This was my complete experience on how to start embroidery thread, hope you guys took good benefit from it. Take Care.


I was suggested this web site by my cousin Im not sure whether this post is written by him as no one else know such detailed about my trouble You are incredible Thanks